Warning
If your purpose for setting up a virtual VPN router is watching USA Netflix on devices such as Roku, Chromecast, Apple TV, Smart TV, iPad, Android, etc then make sure you are using a VPN service that supports Netflix on all devices. Many VPN services are “browser only” for Netflix which means that they only work on your computer. If you are using one of these “browser only” services then then creating a virtual VPN router will not enable you to watch US Netflix on other devices.
Manual Setup for Windows
Here is a video tutorial showing you how to do all of these steps

These instructions are written for Windows 7 but it will also work on Windows 8 and Windows 10. Some of the steps may be different for different versions of Windows and I will try to point out the differences in the steps below.
Step 1 – Create the Virtual WiFi Adapter
Step 1 has 2 options. The quick method uses .bat script files that I wrote to issue the commands automatically automatically (your browser might give a warning that the file could be unsafe, you can safely ignore the warning).
The manual method is by sending the individual commands on the command line yourself.
Choose 1 of the options below.
Option 1: Quick Method
Download these 3 files and save them on your computer.
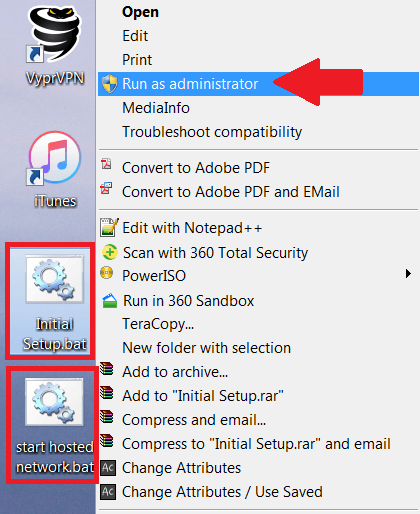
1 – Initial Setup (Use this to automate step 1, only run once unless you want to change the virtual VPN WIFI network name or password)
2 – Start Hosted Network (Use this to turn on the virtual VPN WIFI, required each time you restart your computer)
3 – Stop Hosted Network (Use this to turn off the virtual VPN WIFI, never disable the network adapter!)
To run these files, right click on them and choose Run as administrator as shown below.
After downloading the 3 files, run (as administrator) the Initial Setup file that you downloaded above.
Now you can skip the next section and go to step 2.
Option 2: Manual Method
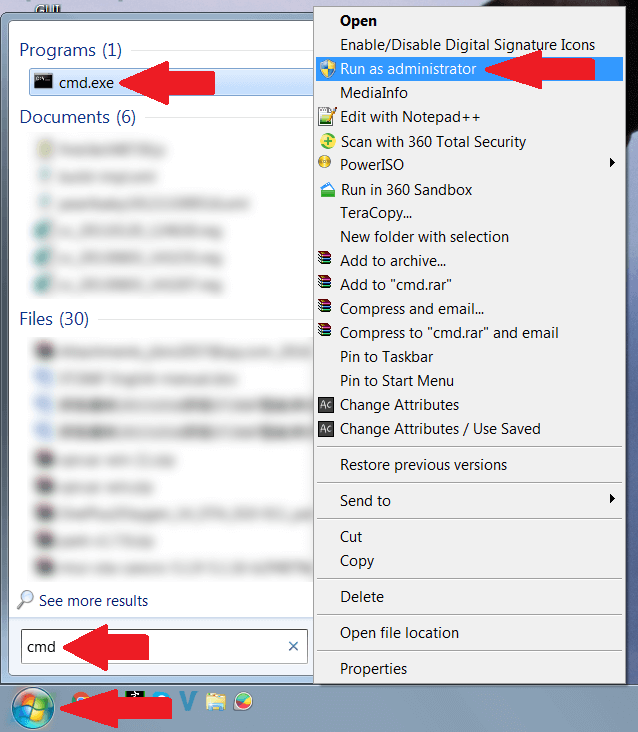
First, you will need to open an administrative command prompt (aka elevated command prompt). To do this in Windows 7 you can click the start button and type cmd and then right click cmd.exe and choose run as administrator.
Alternatively you can click Start Button – > All Programs – > Accessories – > Right click on Command Prompt and choose Run as administrator.
For Windows 8 and Windows 10 you can right click on the Start Button and then choose Command Prompt (Admin).
Now that you have started an administrative commend prompt type the following command to confirm if your network adapter supports a hosted network.
netsh wlan show drivers
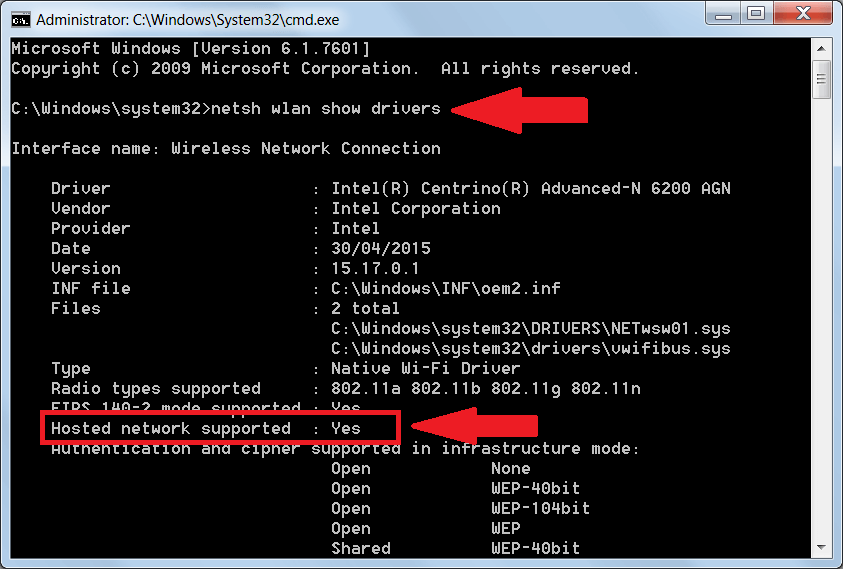
If you see the text Hosted network supported : Yes as shown above then you can continue. If not then you may need to update your network adapter with the latest driver.
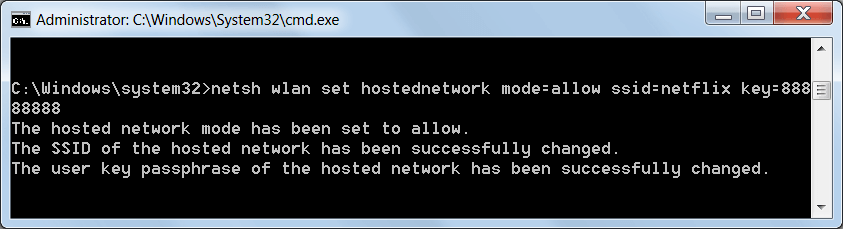
Now type the following command to create your virtual WIFI network adapter.
netsh wlan set hostednetwork mode=allow ssid=NETWORKNAME key=PASSWORD
Replace NETWORKNAME and PASSWORD with the network name and password of your choice. In my case I am using the network name netflix and password 88888888.
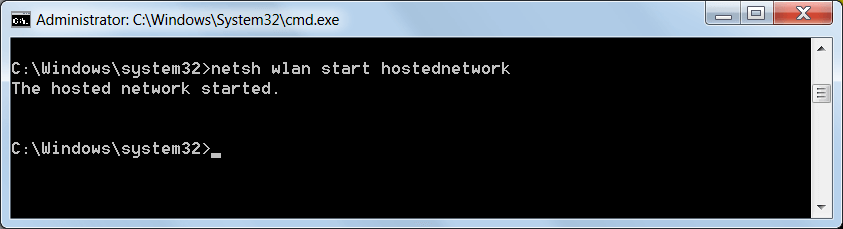
Now that the hosted network has been created you need to start it. Don’t forget to run the below command in an administrative command prompt every time you restart your computer.
Alternatively you can run the Start Hosted Network file available for download above to automate this.
netsh wlan start hostednetwork
Step 2 – Verify that the new network adapter was created
Open the network adapter settings page by pressing Windows Key + R and then type ncpa.cpl and press enter or click OK.
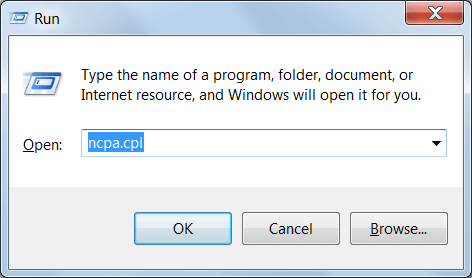
Alternatively you can click Start Button – > Control Panel – > Network and Sharing Center – > Change Adapter Settings (on the left).
You should see a new Microsoft Virtual WIFI Miniport Adapter as shown below. It should be last in the list because it will be the newest adapter created. In my case it is called Wireless Network Connection 3.
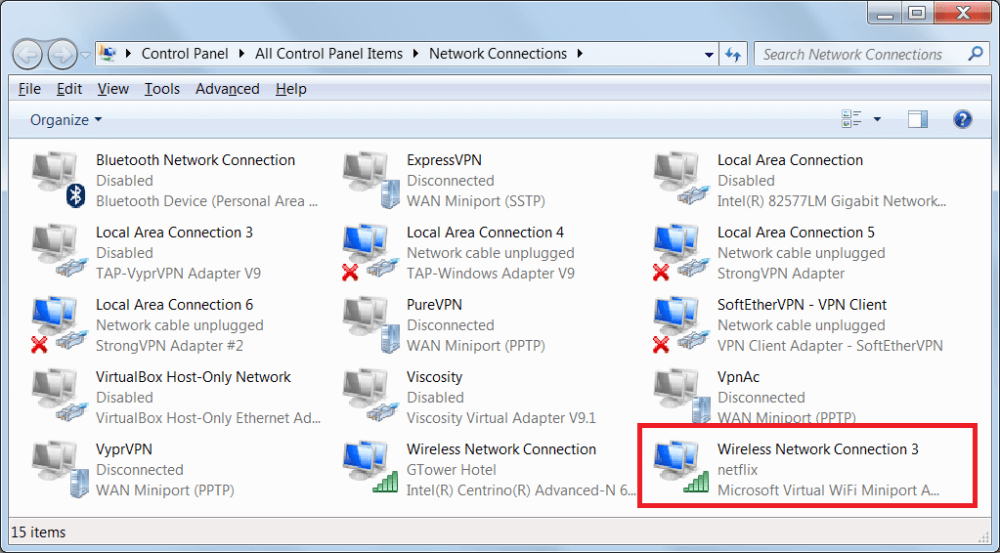
Keep this network adapter settings window open because you will need it for step 3.
Step 3 – Check which network adapter your VPN is using
If you have closed the network adapter settings window from step 2 then open it again (Windows Key + R and then type ncpa.cpl).
You need to find out which adapter your VPN is using. In my case, I have several adapters because I have many different VPN services installed on my computer. Some VPNs will install their own custom named adapter for OpenVPN (such as VyprVPN) and other VPNs will use the generic shared “TAP-Windows Adapter V9” (such as VPN.ac, and others).
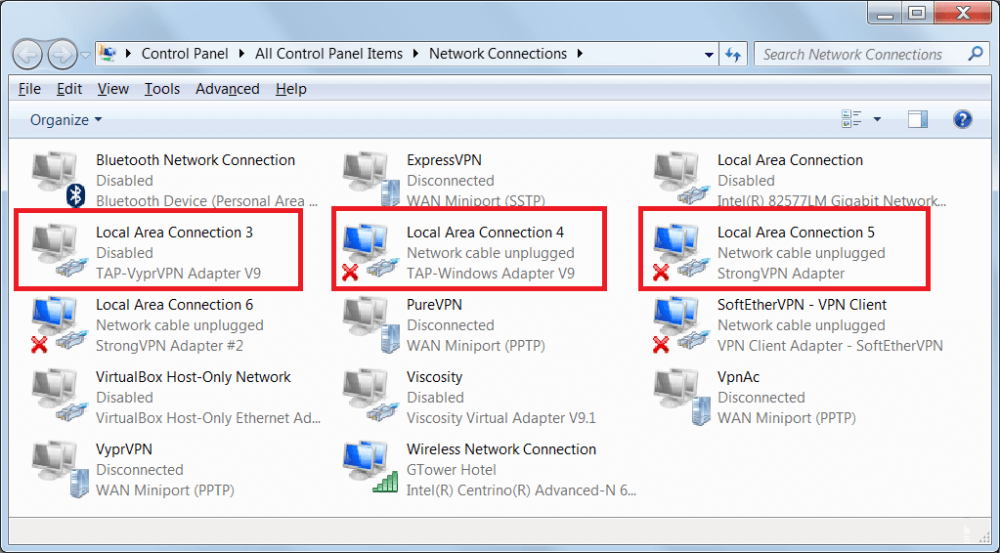
Now connect to your VPN to identify which adapter your VPN is using. When you connect to your VPN, the status will change from Disabled or Network cable unplugged to Unidentified network and the red X on the icon will disappear. When I connect to ExpressVPN using OpenVPN, I can see that the adapter used is Local Area Connection 4 as shown below.

2020 Update – The ExpressVPN app is now using its own named network adapter instead of the generic “TAP-Windows Adapter V9” as shown in the above image.
Note – If you are using PPTP or L2TP protocols then you will need to set up the connection manually in Windows in order to have a permanent network adapter. Most VPN software will create a PPTP or L2TP adapter when you connect and then destroy it when you disconnect instead of a permanent one. Check with your VPN provider to get instructions for manual PPTP or L2TP setup in Windows.
Step 4 – Share your VPN adapter with the virtual VPN adapter
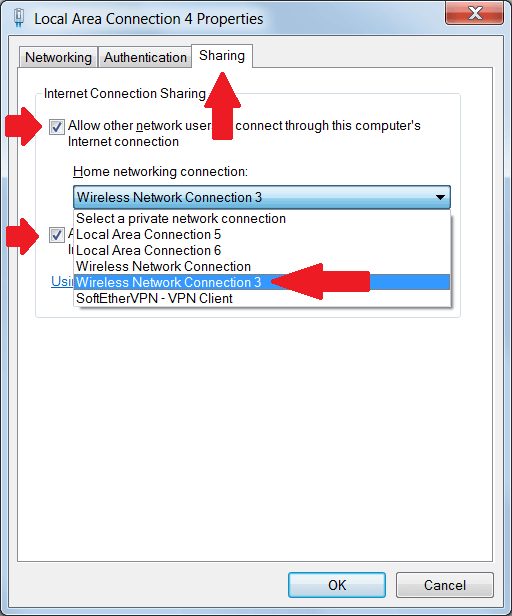
Right click on the adapter that your VPN is using which you identified in step 3 (Local Area Connection 4 in my case), choose properties and then click the sharing tab on the top. Enable both of the options by ticking the boxes and choose your newly created network adapter identified in step 2 (Wireless Network Connection 3 in my case). Click OK after you have made the settings.
Step 5 – Connect to your VPN
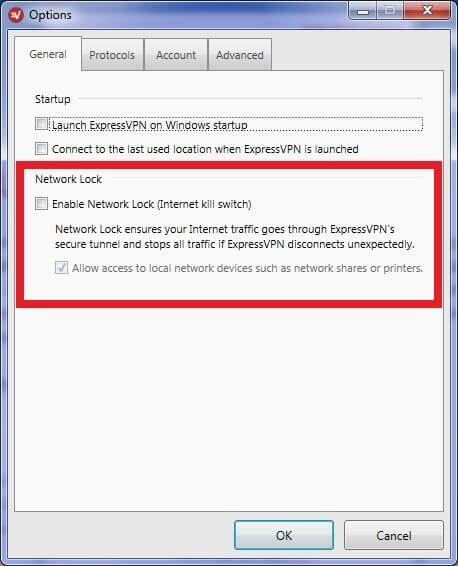
Update – Recently, I couldn’t get my virtual VPN router to work. Eventually, I discovered that the network lock (kill switch) function of ExpressVPN was preventing the virtual VPN router from assigning an IP address to connected devices. After I disabled the kill switch, as shown below, the problem was solved.
You may or may not need to disable the kill switch in your VPN software, depending on how your VPN provider has implemented the kill switch. Some kill switches will kill your virtual VPN router.
Connect to your VPN and then your virtual VPN WIFI will be up and running, you can now connect any other devices to the new virtual VPN router WIFI network.
Note – If you find that the virtual VPN router is unable to assign an IP address to the devices you connect, you may need to disable the kill switch function in the settings of your VPN. Sometimes a kill switch can block the virtual VPN router from connecting to the clients.
Next time you restart your computer, use the files downloaded above to start and stop the virtual VPN WIFI or do it manually using the commands below.
To start the virtual VPN WIFI, type the following command in an administrative command prompt.
netsh wlan start hostednetwork
To stop the virtual WIFI router you can type the following command.
netsh wlan stop hostednetwork
To disable the adapter completely you can type the following command.
netsh wlan set hostednetwork mode=disallow
Remember that your virtual VPN router will only work while your VPN is connected. If you disconnect your VPN then the virtual WIFI will not have any connection to the internet.
Warning – Always use the above commands or downloaded files to stop and start the hosted network. Never disable the virtual adapter, this will cause the virtual VPN router to stop working. If you disable the virtual adapter then you will get the below error when you try to start the hosted network, even after restarting your computer.
“The hosted network couldn’t be started.
The group or resource is not in the correct state to perform the requested operation.”
If this happens, you can re-enable the adapter by following these steps.
1. Open the device manager by pressing Win Key + R and then typing “devmgmt.msc” and press enter.
2. On the top menu, click “View” and then enable the option “Show hidden devices”.
3. Find the virtual adapter in the network adapters section and then enable it.
Software Setup for Windows
You can use free software to turn your computer into a virtual VPN router instead of setting it up manually. I would recommend using the manual setup because we don’t know much about the developers of these software programs (most are Chinese companies and the software could potentially monitor your internet traffic).
Step 1 – Download the software
The software I used is called OSToto Hotspot. There are others which I have not used but will include the links below. Please leave your comments below if you have used any of these.
Free Software:
OSToto Hotspot (the software used in my video tutorial)
Virtual Router
Wi-Host
mHotspot
Paid Software:
Step 2 – Connect to your VPN
Make sure that you connect your VPN before enabling the hotspot. If you connect to your VPN after enabling the hotspot then it will not work.
Step 3 – Enable the hotspot
Step 4 – Enjoy VPN on all your wireless devices
Step 5 – Disable the hotspot
Step 6 – Disconnect from your VPN
If you want to disconnect and re-connect to your VPN (changing servers for example) make sure you disable the hotspot in the software first otherwise you may find that the wireless devices connected to the hotspot have no internet connectivity or your computer may have no internet connectivity. If this happens then close everything. Disable the hotspot, disconnect from your VPN, and then start over again.
Just remember this.
To Connect – VPN first, Hotspot second.
To Disconnect – Hotspot first, VPN second.
Manual Setup for Mac
Note – PPTP was removed from the latest version of Mac OS. This should also work using L2TP following the same instructions. L2TP is a more secure protocol anyway so I would recommend trying L2TP first even if you have an older version of Mac OS with PPTP available.
Step 1 – Setup a Manual PPTP VPN connection on your Mac and then connect to it
You must create a manual PPTP connection in the Mac OS system settings. It will not work if you are connecting to PPTP using VPN software. Check the instructions from your VPN provider on how to connect manually with PPTP.
Step 2 – Share your PPTP VPN connection
Open the system preferences menu and then choose sharing. Select Internet Sharing (but don’t check the box yet) and then set the following options.
Share your connection from: Choose the PPTP connection you created in step 1.
To computers using: Choose Wi-Fi
Click the Wi-Fi Options button and set the options as follows.
Network name – Choose any network name
Channel – Choose any channel (recommended to choose a different channel than your main router)
Security – Choose any (recommended to choose WPA2 Personal)
Password – Choose any password
Verify – Same as above
Press OK.
In the sharing menu you can now check the box next to Internet Sharing and then click the start button.
To stop internet connection sharing simply un-check the Internet Sharing box.
You have to have a mac with both ethernet and wifi to make it work, but beside of that, it works like a charm, from Denmark.. Magnificent Thanks
Great idea James. I setup a vpn server on my vps in addition to ss. Method goes: Run ss first on client, then connect to vpn server, then
hotspot that vpn connection over wifi and presto, you got yourself vpn-enabled wifi! Only minor inconvenience is it’s slower than direct ss, but still super useful when I need it!
Your tutorial worked fine setting up a virtual vpn router on my laptop.
I’m having one weird problem though.
When I run a dns leak test I’m getting my vpn dns and opendns servers. This doesn’t happen on the computer running the vpn client, just devices connected to the virtual vpn router. Any ideas on how I might fix that?
Thanks
nahh the mac version did not work, i will try once more…
What happened when you tried it on Mac? Did you successfully connect to a VPN using PPTP but the connection sharing failed? Pleas provide more details.